Install
To install normalMagic please see the relevant section for your version:
Base Version is installed as an asset library.
Pro Version is installed as an add-on (that is packaged with the asset library).
Base Version (Asset Library)
The Base version of normalMagic is installed as an asset library, not an add-on.
TLDR
Download the .zip, extract to a folder, add the folder as an asset library.
For more detailed instructions see below.
For more information on asset libraries you can check Blender's Official Documentation
First Time Install
- Download latest .zip file for the closest Blender version (normalMagic 4.5 v1.0.blend).
- Unzip/extract to a folder in your desired location.
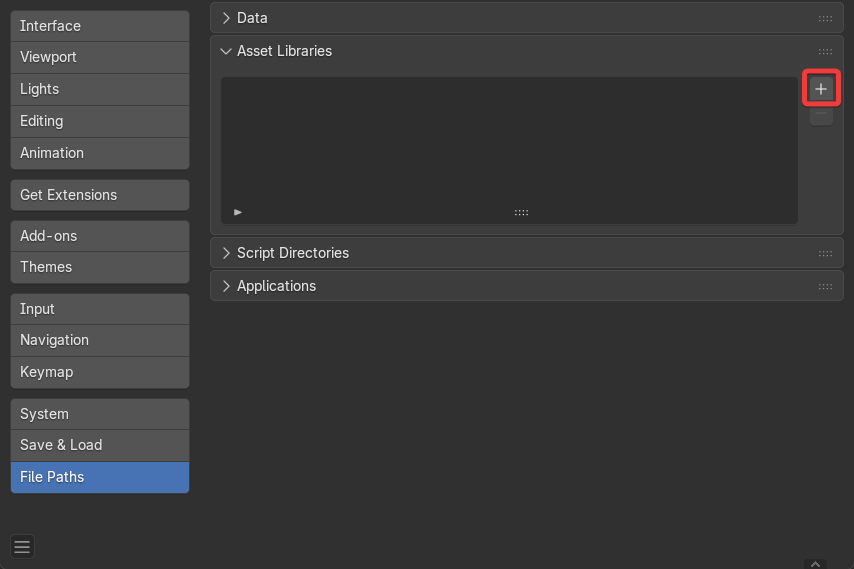
- Open Blender and go to Edit/Preferences/File Paths/Asset Libraries.
- Click + Add Asset Library.
- Navigate to the unzipped folder and press Add Asset Library.
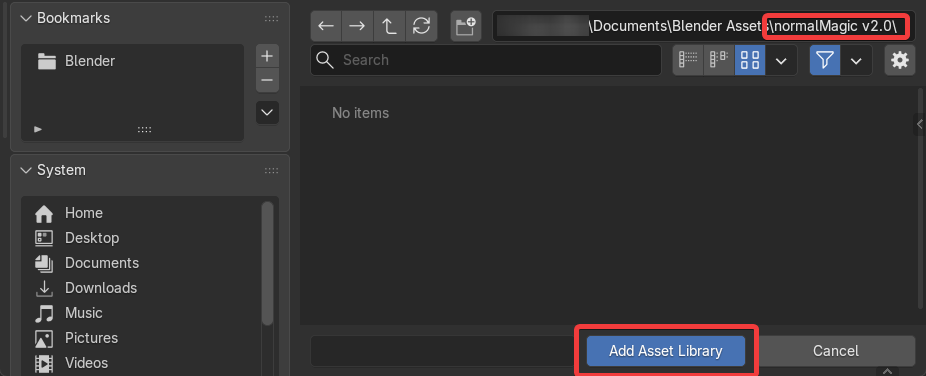
- You should now see "normalMagic" in your asset libraries.
Optional: Here you can choose how the data is imported by default. Setting this to Pack or Link will make it easier to update versions. Link will also reduce file sizes. See the Official Documentation for more information.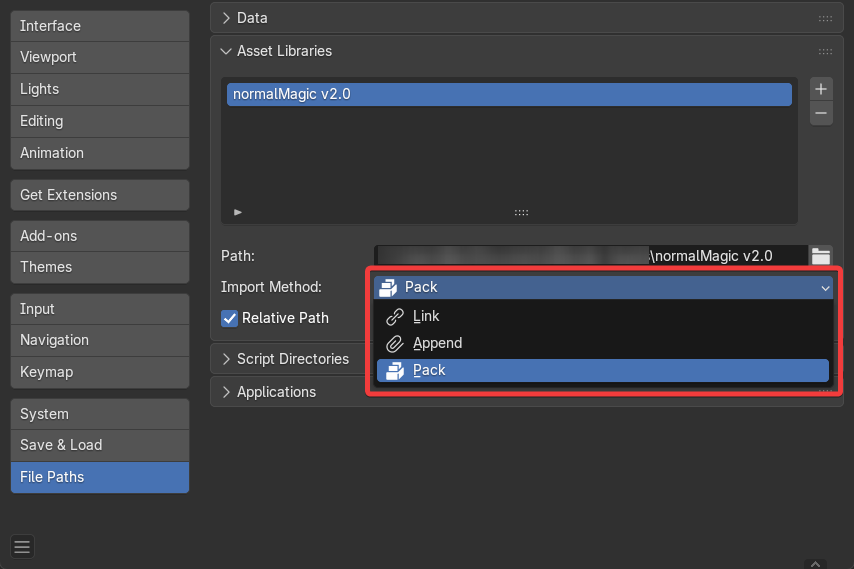
normalMagic should now be installed. Modifiers will now show up under the Add Modifier menu:
Update Asset Library
To update to a newer version of the normalMagic asset library:
- Remove existing asset library under Edit/Preferences/File Paths/Asset Libraries.
- Repeat install instructions to add new version.
Alternatively you could replace the files in the existing library with the newer ones.
Pro Version (Add-on)
The Pro version of normalMagic is installed as an add-on. The asset library is now packaged with the add-on and can be set up with a single click.
TLDR
- Download the add-on .zip file and drag it into Blender's viewport.
- Click "Automatic Install" to set up the asset library. (Recommended)
Remove Existing Asset Libraries
Updating from 1.x versions will require removing the existing asset library from Edit/Preference/File Paths/Asset Libraries.
Install Add-on
To install/update the add-on simply:
- Download the latest "addon" .zip file.
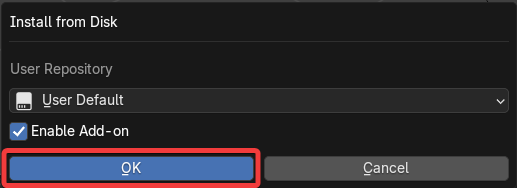
- Drag the .zip file into Blender and press OK.
You should now see a "Normal Magic" tab in the sidebar of the 3D viewport.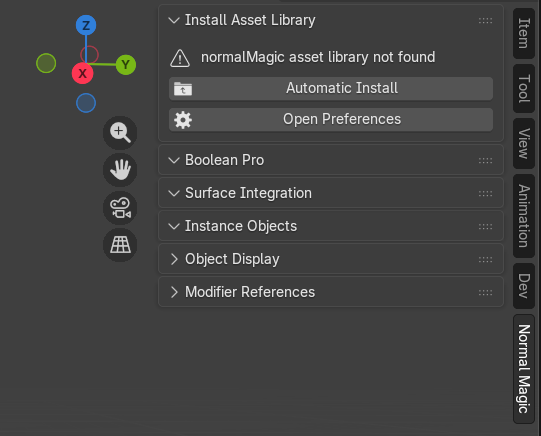
- Press Automatic Install to install the asset library from the add-on (recommended). or Open Preferences to add the asset library from elsewhere (See the next section).
Custom Asset Library Location
It is advised to install the asset library from the add-on to keep them in sync. However, if you want your asset library imported from another location follow the instructions below.
- Remove any existing normalMagic asset libraries from Edit/Preferences/Filepaths.
- Install the asset library.
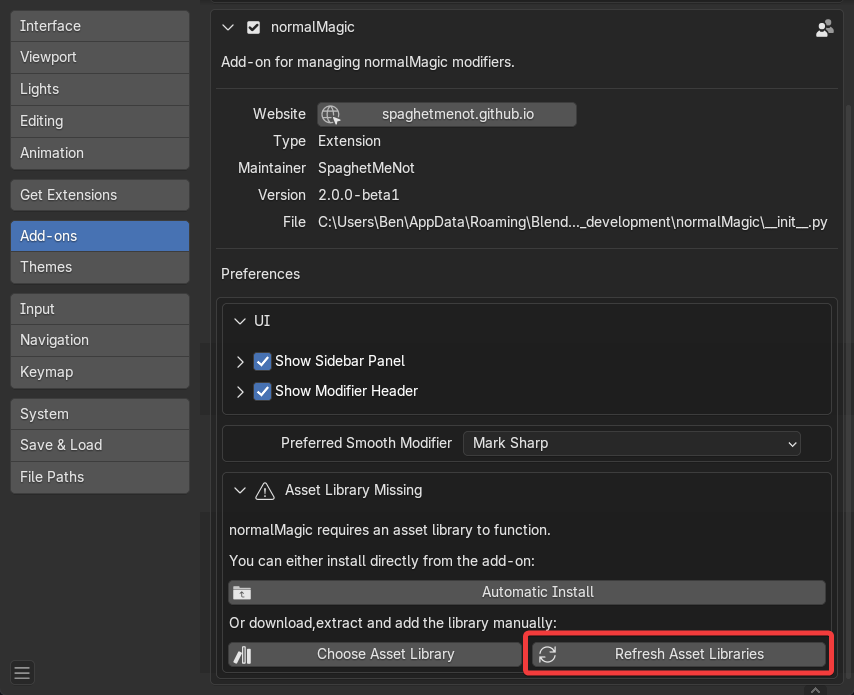
- Through the Choose Asset Library button in the add-on's Preferences.
- Through Edit/Preferences/Filepaths (see Base Version instructions).
- Refresh Asset library location. (Alternatively you can disable/re-enable the add-on or restart Blender).
Update Add-on
- Drag the new .zip file into Blender, this will update the existing version.
- Press "Automatic Install" to set up the new asset library. If you are using a custom asset library location this will need updating manually.
Update Existing Scenes
Modifiers that already exist in scenes might need updating depending on your asset library setup.
Linked/Packed Library
Update modifiers in existing scenes if library is set to "Link":
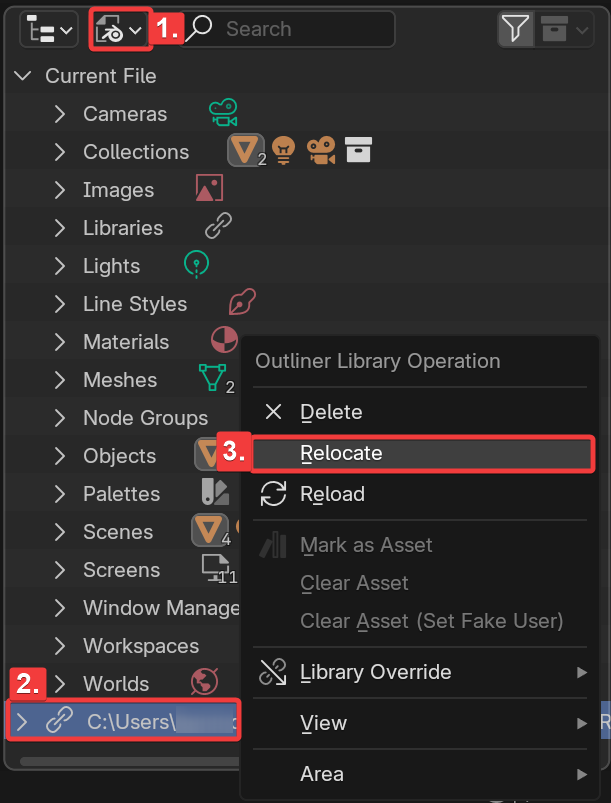
- Go to the outliner and change the view to "Blend File".
- Locate the normalMagic file.
- Right Click/Relocate.
- Select .blend file in the current asset library path.
Appended Library
Update modifiers in existing scenes if library is set to "Append":
- Add new version of modifier somewhere in your scene.
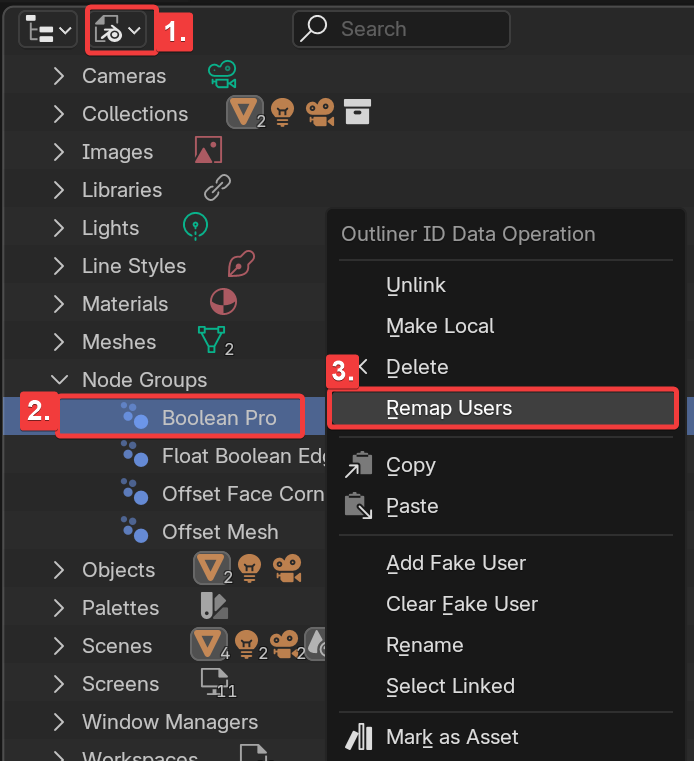
- Go to the outliner and change the view to "Blend File".
- Find the modifier under "Node Groups".
- Right Click/Remap Users.
- Select the newer version (most likely called ".001").